


You could make out from the travel blogs on this site that my family loves to explore. Our boys were born into it. To continue doing that, where else should we be other than be at the center of the globe, Dubai with the world’s best airline – Fly Emirates.
Being said that, you might have also noticed that the we are equally keen to experiment with tech.
For long I had this big audacious idea of building a map to visualize the world we explored so far and plan forward. We brainstormed on couple of ideas:
Option 1: Get a big LCD TV, add a touch panel on top, connect it to a Raspberry Pi along with Google photos and enclose it all in a wooden frame. Ultimately, we thought of building a big, interactive, digital photo frame. Something straight forward and easy to accomplish. But that did not sound cool enough. To spice it up, we decided to add some intelligence into it based on our learnings from the vision systems in our hexabot project. Frame should recognize the people in front of it and automatically display their photos or something in those lines. Yeah! Now we are talking!
Option 2: Go dump and analog but classic and artistic. Well, techno artistic. The idea was to CAD and 3D print all the countries, put them together, paint the topography, use fiber optic cables to light up the places we have been and frame it up. We weren’t sure of the complications behind it as we never did something this intricate before or even read about it. THAT made us loved the idea. So, we dropped the digital option and decided to go artistic and classic!
What should be size? What materials to use? Where to get them from? How much will it cost?
Before we even start thinking of anything complex, we decided to fix the dimensions first. Something that will look neat and suits our kind of living space. Width and height were easy to come up with, but we needed more info to fix the depth. We wanted to keep the depth to the bare minimum. For that, we got to find the smallest fiber optic unit. Also, the quality and flexibility of fibers might have an impact the height. After researching possible options and prices at the Amazons of the world, we decided to go checkout the ‘Dragon Mart’ – the best place to get DIY stuff in Dubai.
We were specific about what feature we are looking for in the fiber optic unit in terms of:
- Size and shape: Fit within a maximum depth of 10cm with enough space left for ventilation
- In-built lamp cooling: As the LEDs can get very hot on continuous usage, it is important to have an inbuilt cooling system to avoid any fire hazards. We were looking for one with at least two fans
- Number of fibers: Each fiber will represent a trip (more or less). We decided to go with at least by 250 fibers to start. We can always add another unit when required
- Power brick: Another important thing to avoid fire hazards as well as prolong the life of the LED is to have a sufficiently powerful power brick. We decided to go for 60W
- Starry effects: This is more for the aesthetics. We wanted a base unit with perforated rotating disc that creates the starry/twinkle effect.
The one we chose costed around 150$ (including the base unit, 250 fibers and the power brick).
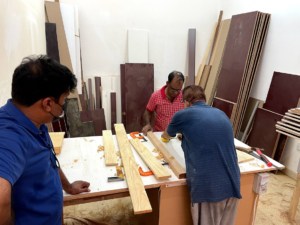
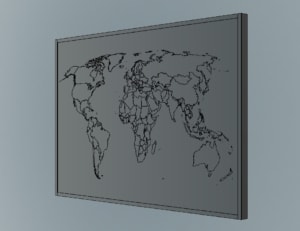 Next item to fix was the medium we want to use as canvas to stick the 3D printed countries. Choices were wood panel or acrylic sheet. We chose transparent acrylic sheet as the initial idea was to backlit the country borders (dropped that idea during the experimentation phase as we understood that it will overshadow the fiber optics). If you are planning to repeat this project, remember that both the choices (wood/acrylic) will work. After a bit of research and asking around, we found Frame Shop Dubai was the place one should go for quality acrylic sheets at a reasonable price. Azad, the man in charge, gave me a few sample acrylic pieces so that I can do my experiments before I start with the real project. Buying wood was straight forward as we do not have much options here in Dubai but ACE hardware. Postponed it for later as there is no dependency on wood for our experiments. Based on all these information, made a quick CAD model to confirm the design and dimensions.
Final planned total dimensions were 122x82x12cm with 120x80cm canvas space.
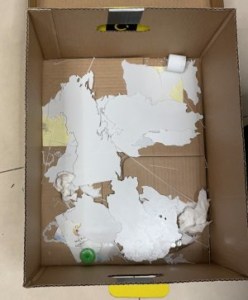 Filament type: After printing few prototype parts, we chose PLA against ABS for many reasons including toxicity (we will be printing a lot of parts in a home set-up), dimensional accuracy (critical to have all the country borders line up), risk of wrapping of bigger countries etc.. Only thing that stood against PLA was the thermal properties but for this project, we did not see it as a show stopper. We used the white ST-PLA from Creality3d.


All the best
All the best. Go ahead. Truly very interesting
Nice! Looks great 👌
Awesome Read..I would like to Make Something as well of the places u been in India in future.Inspirational🤩🤩
Thank you Akash… you have already travelled a lot… you can start with it right away… ping me if you need any help…
You can find a more detailed digital (Google Maps based) version here:
https://www.jyothisnair.com/travel/
Truly inspiring! 😃
Thank you chechi…